Table of Contents
As I laid out my gear on the kitchen table after a thorough cleaning session, I couldn’t help but reflect on how each piece had become an integral part of my detecting adventures. Over the years, I’ve learned that having the right tools can make all the difference between a frustrating day in the field and a rewarding one. So, I thought I’d share my top 10 essential pieces of metal detecting equipment, based on years of experience trudging through fields and beaches in search of hidden history.
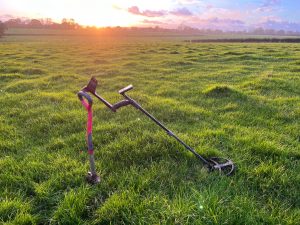
The Metal Detector
The metal detector is the cornerstone of our hobby, and choosing the right one can be a daunting task. I remember my first detector, a basic model that served me well as I learned the ropes. It was simple to use but limited in its capabilities. Now, I use a mid-range machine with good discrimination and depth capabilities.
When selecting a detector, consider your experience level, budget, and the type of detecting you plan to do. Are you primarily interested in coin shooting in parks? Or are you more drawn to relic hunting in old farmlands? Different detectors excel in different areas.
For beginners, a simple single-frequency detector with good ground balancing capabilities is often a good start. As you progress, you might want to consider multi-frequency detectors that can handle a wider range of soil conditions and target types.
I’ve found that investing in a quality detector pays off in the long run. Better discrimination means less time digging junk, and improved depth capabilities can help you unearth treasures that others might have missed.
The Pinpointer
Next on my list is a reliable pinpointer. This handheld device has saved me countless hours of frustration. It helps locate small objects in the soil once you’ve dug your hole. I can’t count the number of times I’ve thought a target had somehow vanished, only to have my pinpointer zero in on a tiny hammered coin or button tucked away in a clod of earth.
A good pinpointer should be waterproof (for those inevitable encounters with puddles or wet sand), have adjustable sensitivity, and ideally, a vibrate function in addition to audio alerts. Some even come with LED lights, which can be handy when detecting in low light conditions.
I always make sure my pinpointer is fully charged before heading out. There’s nothing worse than having it die on you just as you’re closing in on an elusive target!
Digging Tools
A sturdy digging tool is worth its weight in gold (or silver, or bronze, depending on what you’re finding!). For most of my detecting, I rely on two key tools: a stainless steel trowel and a good quality metal detecting spade.
The trowel is perfect for precise digging in areas where space is limited or when I’m working with shallow targets. It’s strong enough to cut through tough soil but small enough to make neat holes.
However, for deeper targets or when I’m working in open fields, my spade becomes indispensable. I use a long-handled spade with a sharp, slightly curved blade. This design allows me to cut clean, neat plugs in grassy areas – essential for responsible detecting where we aim to leave no trace of our activities.
When choosing a spade, look for one with a strong shaft and a comfortable grip. The blade should be sturdy enough to handle tough, rocky soil without bending. Some detectorists prefer spades with a slightly smaller blade for easier maneuvering, while others opt for full-sized garden spades.
I’ve found that a spade with a treaded top edge can be particularly useful. It provides a comfortable foot rest for when you need to apply extra pressure to cut through tough ground. Some spades designed specifically for detecting even come with depth markers on the blade, which can be handy for estimating how deep your target might be.
Remember, whether you’re using a trowel or a spade, the key is to dig responsibly. Always cut a neat plug, carefully remove your find, and then replace the plug as if you were never there. A good spade makes this process much easier and more efficient.
When choosing your digging tools, look for ones made of high-quality materials. Cheap trowels or spades can bend or break, leaving you in a lurch in the middle of a detecting session. I prefer tools with a serrated edge on one side – they cut through roots more easily.
Between my trowel and my spade, I’m prepared for nearly any digging situation I might encounter in the field. These tools are the workhorses of my detecting kit, and I wouldn’t dream of heading out without them.
Remember, responsible detecting means leaving the site as you found it. A good digging tool should allow you to cut clean plugs that can be replaced neatly, leaving no trace of your activities.
Finds Pouch
A finds pouch is another essential item. I learned early on that fumbling in pockets for somewhere to store my finds was a recipe for disaster. Now, I use a dedicated finds pouch attached to my belt. It has separate compartments for different types of finds, keeping everything organised until I get home. There’s nothing worse than realising you’ve lost a special find because it slipped out of your pocket!
Look for a pouch with multiple compartments – I like to keep my coins separate from my relics, and have a special section for any potential treasure finds that need to be reported. Some pouches come with clear front panels, which can be handy for quickly checking what you’ve found without having to open the pouch.
Waterproof material is a plus, especially if you’re detecting in wet conditions. And make sure the pouch attaches securely to your belt or harness – you don’t want it falling off as you’re navigating a tricky bit of terrain.
Ground Mat
A ground mat might seem like a luxury, but it has become an essential part of my kit. It gives me a clean, dry place to kneel while I’m digging, and it’s also great for laying out my finds for a quick photo at the end of the day. Plus, it helps ensure I don’t leave any mess behind – an important consideration for any responsible detectorist.
I prefer a mat with a waterproof backing to keep the damp at bay, and a soft upper surface that’s comfortable to kneel on. Some mats come with built-in pouches or loops for storing small tools, which can be handy.
The ground mat also serves as a visual reminder of where I’ve been working. When I’m done with a hole, I make sure to replace the plug and move my mat to the next spot. This helps me keep track of where I’ve detected and ensures I’m not leaving any open holes behind.
Headphones
A good pair of headphones can make all the difference when you’re trying to interpret the subtle signals from your detector. They help block out wind noise and allow you to hear those faint whispers that might indicate a deep target. I prefer wireless headphones for the freedom of movement they offer, but a sturdy wired pair works just as well.
When choosing headphones for detecting, comfort is key. You might be wearing them for hours at a time, so look for a pair that doesn’t put too much pressure on your ears. Water-resistance is also important – you never know when you might get caught in a shower.
Some detectors come with special waterproof headphones that can be submerged – these are great if you’re planning on doing any water detecting. Otherwise, a good pair of sports headphones usually does the trick.
Smartphone
Modern smartphones have become invaluable tools for detectorists. With apps for mapping, target identification, and even keeping records of your finds, they’ve replaced several pieces of equipment I used to carry. Make sure you’ve got a good protective case though – detecting can be tough on electronics!
There are apps available that can help you identify coins and relics, log your finds with GPS coordinates, and even connect with other detectorists in your area. Some of my favourites include apps that overlay historical maps onto modern satellite imagery – they’re great for identifying potential hotspots.
Don’t forget to download offline maps of your detecting areas. You might find yourself in places with poor cell coverage, and the last thing you want is to lose your bearings because you can’t load a map.
Cleaning Tools
A small kit of cleaning tools is always in my detecting bag. This includes soft brushes, wooden toothpicks, and a spray bottle of water. These allow me to gently clean my finds in the field, revealing details that might help with identification. Remember, though – some finds are best left uncleaned until you can consult an expert.
For coins and robust metal objects, a soft toothbrush can work wonders. For more delicate finds, I use a soft paintbrush. Wooden toothpicks are great for carefully removing stubborn dirt from crevices.
I can’t stress enough the importance of being gentle with your finds. Overzealous cleaning can damage delicate items or remove valuable patina. When in doubt, it’s best to wait and seek advice from a professional.
Backpack or Carrying System
With all this equipment, you need a way to carry it comfortably. I use a sturdy backpack with plenty of compartments to keep everything organised. It’s waterproof (a must in our British weather!) and has comfortable straps for those long walks to and from detecting sites.
Look for a backpack with a waist strap – it helps distribute the weight and makes those long detecting sessions much more comfortable. Multiple compartments are useful for keeping your gear organised. I like to keep my food and drink separate from my electronics and digging tools.
Some detectorists prefer a chest pack or a harness system. These can be more comfortable for long sessions and allow easier access to your tools. Experiment to find what works best for you.
Reference Guides
Last but not least, I always carry a small reference guide in my pack. While smartphone apps can be useful, there’s something reassuring about having a physical book to consult when you’re trying to identify an unusual find. I’ve found that a basic guide to coins and a local history book can be invaluable resources in the field.
Over time, you’ll probably accumulate a small library of reference books. For everyday detecting, I recommend a compact coin guide that covers the main periods you’re likely to encounter in your area. A small book on local history can also be helpful – it might give you clues about good places to detect or help you understand the context of your finds.
Don’t forget to keep up with online resources as well. There are many forums and websites dedicated to metal detecting where you can share your finds and get help with identification.
Don’t forget food and drink too, metal detecting can be hot, thirsty, hungry work!
Conclusion
As I packed up my gear, ready for the next day’s detecting, I couldn’t help but feel a sense of anticipation. Each of these tools plays a part in the exciting process of discovery, from the first beep of the detector to the final identification of a find.
Of course, the most important thing you can take with you into the field isn’t something you can buy – it’s knowledge, respect for the land and its history, and a sense of responsibility. Always make sure you have permission to detect, follow the code of conduct, and report any finds that could be considered treasure.
With these ten essential pieces of equipment, you’ll be well-prepared for whatever treasures the soil might yield. But remember, the real joy of metal detecting isn’t just in what you find, but in the connection it gives you to history and the thrill of never knowing what the next signal might bring.
So, check your kits, charge your batteries, and get out there. Who knows what stories from the past are waiting to be uncovered with the help of these trusty tools? Happy hunting!